
This Website
27 Dec 2024
This site was created as a place where I could showcase projects that I've worked on, but it ended up being a project all its own! I am not a front-end person, but because of what I'm learning through this process, I've started to become fairly comfortable in this environment.
Sections:
GitHub Pages
My plain old GitHub repository was pretty bland and I wanted something that would both stand out to potential employers and be a little easier on the eyes when referencing my own pages, so I decided to use GitHub Pages to make a nicer looking website. GitHub Pages supports using the Jekyll site generation framework, so I set up a repository for this page and chose the Midnight theme to work with. I forked the theme's repository, edited the CSS a bit to suit my tastes (those ugly green buttons had to go), and started creating content. Git was, and remains, a bit frustrating to deal with at times, but now that I have a rhythm for everything this setup is extremely easy to manage.
Jekyll
There was a bit of a learning curve with Jekyll, but it's a great tool for automating front end code after the initial setup is complete. As an example, Jekyll uses what they call "front matter", which is a small header at the top of the markdown files for posts like the one I'm writing right now. Here you can see what the front matter looks like for this file:
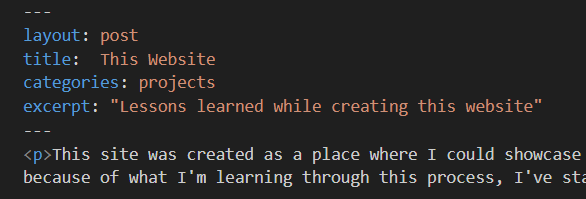
Using the category tag allows the different pages of my website to be automatically populated with the correct posts as soon as I create a new file. Here is an example of the projects page:
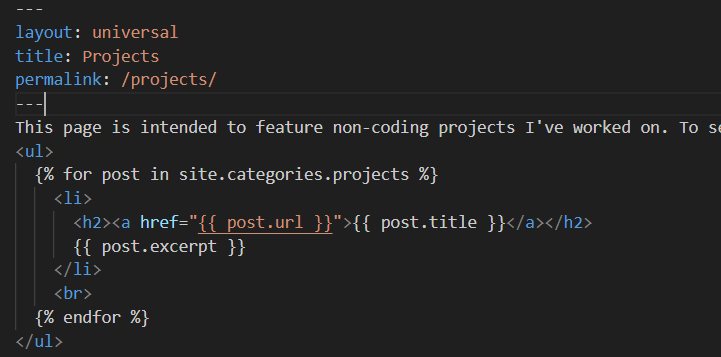
How cool is that?? Jekyll definitely made life easy for this project.
Contact Form
Originally, I just used a mailto link for my email even though I knew it was susceptible to scraping and that I would end up receiving spam and phishing emails because of this. That would have been a terrible example for a website focused on cybersecurity, so I did a bit of research and found Formspree. This site offers a simple, free contact form which forwards information to my personal email and it even includes free spam filtering. Unfortunately you have to pay for things like a custom redirect page but not too bad for a free service!
Google Analytics
I have mixed feelings about including anything from Google on my website, but I really wanted to see what kind of traffic I was receiving and monitoring the behavior of that traffic should be a good way to guide any future development or promotion. This was a fairly simple process, especially with Jekyll. All I had to do was sign up for a free Google Analytics account and replace the contents of my head-custom-google-analytics.html file with the code snippet from my Google Analytics page. Now you're being stalked by Google on every inch of my website 😉
Cheerpj and Logisim
This turned out to be kind of a big project. I wanted to do more than just show screenshots of my projects and explain them - I wanted the projects to be interactive. I found Cheerpj, which was a great way to host Java programs in the browser, but then I needed to run Logisim. By itself, Logisim ran fine, but in order for it to load my assignment, I had to modify the source code within the JAR file. Although I had three different Java courses in school, we learned nothing about JARs. There was a filesToOpen array which loaded files at startup, but it would not add my file and I could not figure out why. Through Stack Overflow, I learned that files referenced within a JAR are resources and not files.
So in order to load my project file, I had to first convert the resource object to a file object:
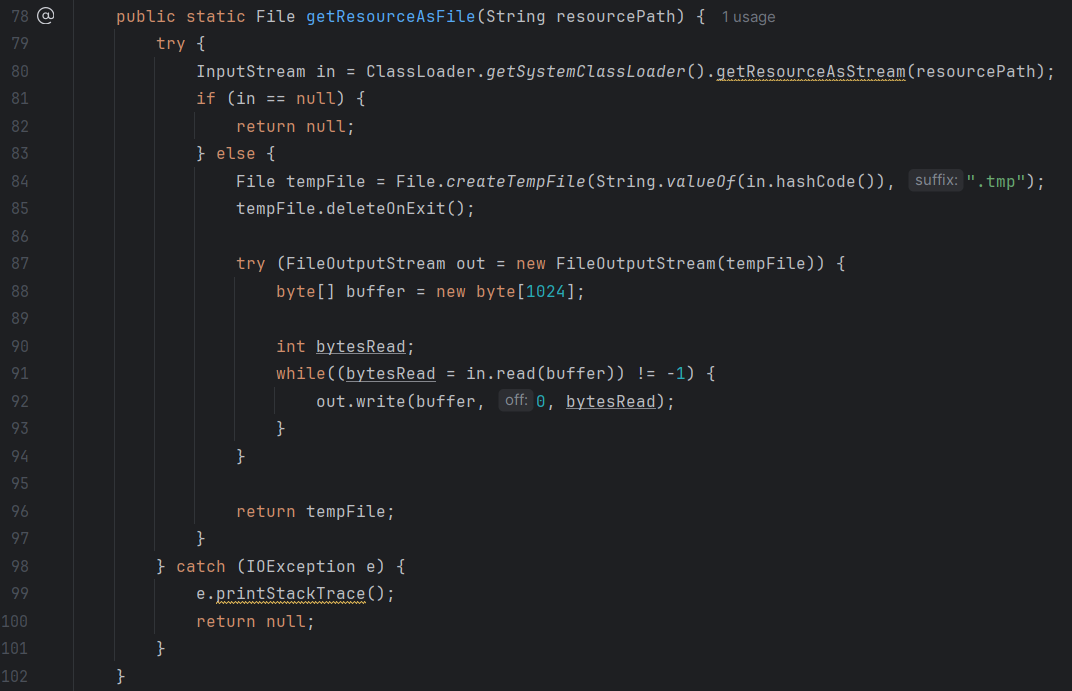
This method was copied from Lukas Masuch's reply to this post on Stack Overflow and worked perfectly as written. I added this method into the /gui/start/Startup.java file and then I had to write a couple lines of code to add the file object to the filesToOpen array. Once the file is in this array, Logisim will load it on startup:

Now everything loaded, but the window on startup was very small. After a lot of hunting through the code, I was able to find this entry at line 257 in the /gui/main/Frame.java file, comment it out, and add my own line at 258 so that the window would be maximized on startup:

I learned a lot from this seemingly small project! If you would like to run the JAR locally or download the project file, I have them both in the repository here.